So with Xamarin, no more need of learning a new language but still being able to
publish your apps to the other mobile OS stores. Another compelling feature,
you can build your apps for Android/iOS from your Windows machine as well as
Mac machine. It’s awesome!
Setup your PC to build Xamarin Apps
To start building your apps using Xamarin, you first need to setup your PC to be
able to work with Xamarin. The 1st step to start is to download Xamarin from
http://xamarin.com/download. Once you have filled in the form and go to the Thanks page, a downloader is already
being downloaded on your PC. Double click the XamarinINstaller.exe file and the
setup will start on the computer. The installer will install all the pre-requisites
along with Android SDK, Xamarin Studio and libraries Xamarin.Android & Xamarin.VisualStudio
for creating apps. Once the software is installed, you can start building apps
using Xamarin Studio or Visual Studio as well. One thing to note is that to start
using Xamarin in Visual Studio you either need Business edition or can start
a free trial of the same.
Hello World App in Android
To start with, we will open Visual Studio and follow the below steps –
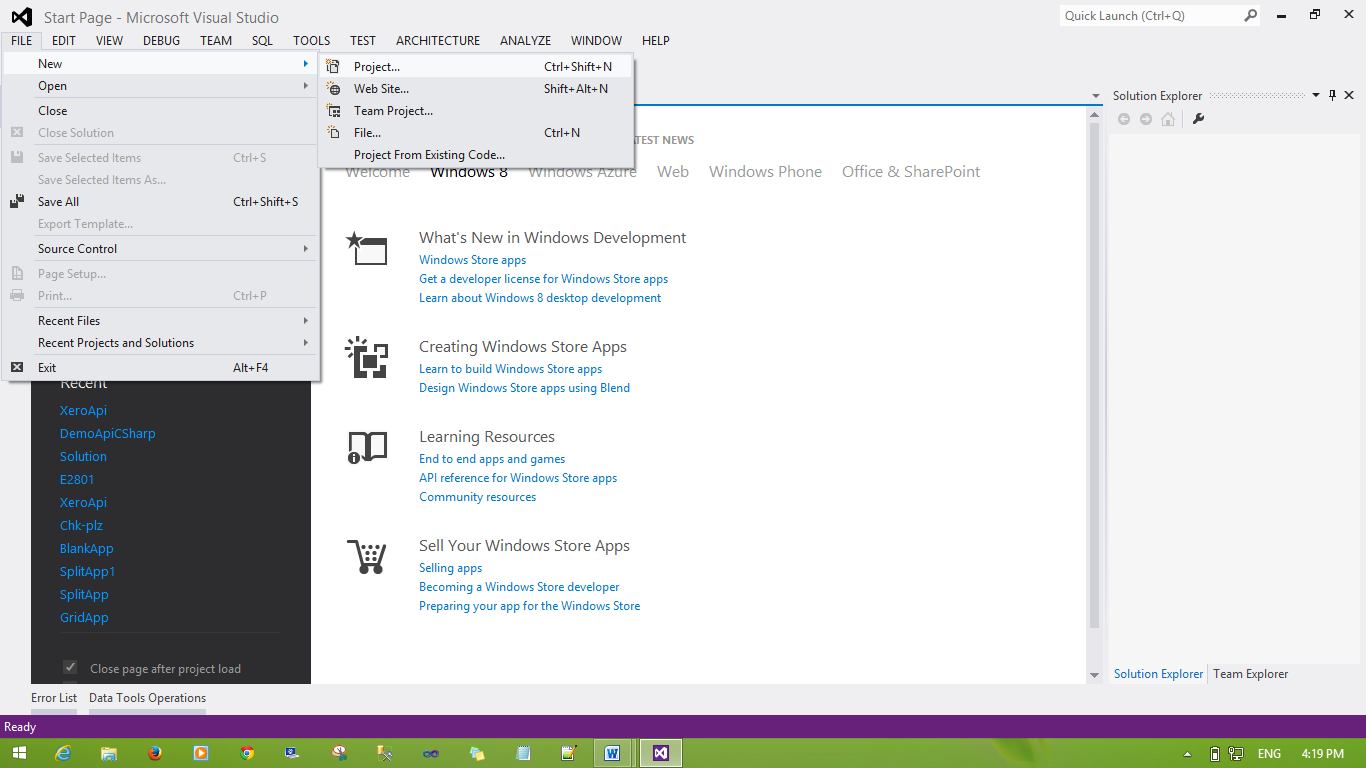
• Click File > New > Project to start a new project.
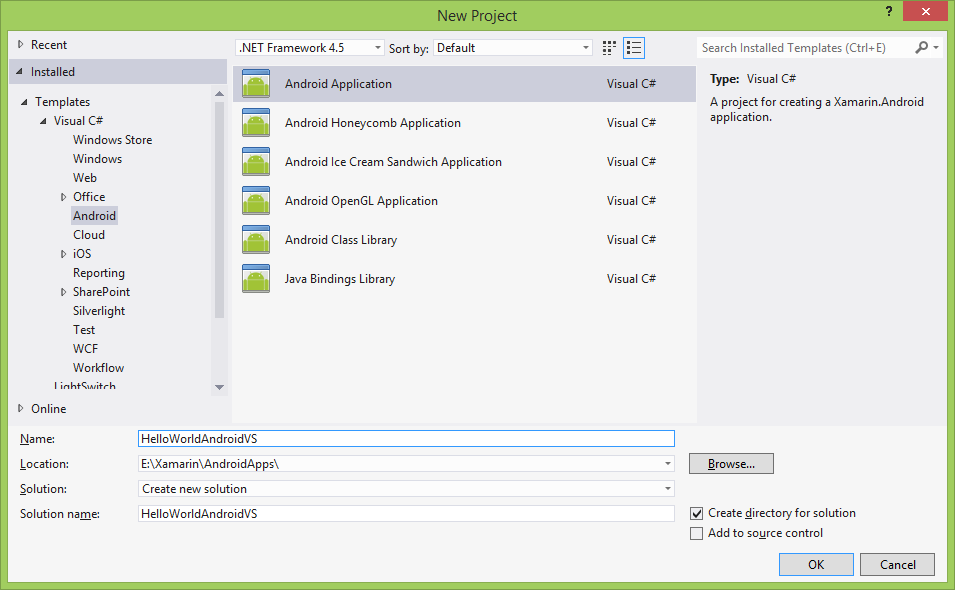
• Select Android from the left tree and then select “Android Application” template
from the right. Type in a name for the project and hit OK or press “Enter”.
• As soon as the project is created with this template, you will see a lot of files
and folders created as below.
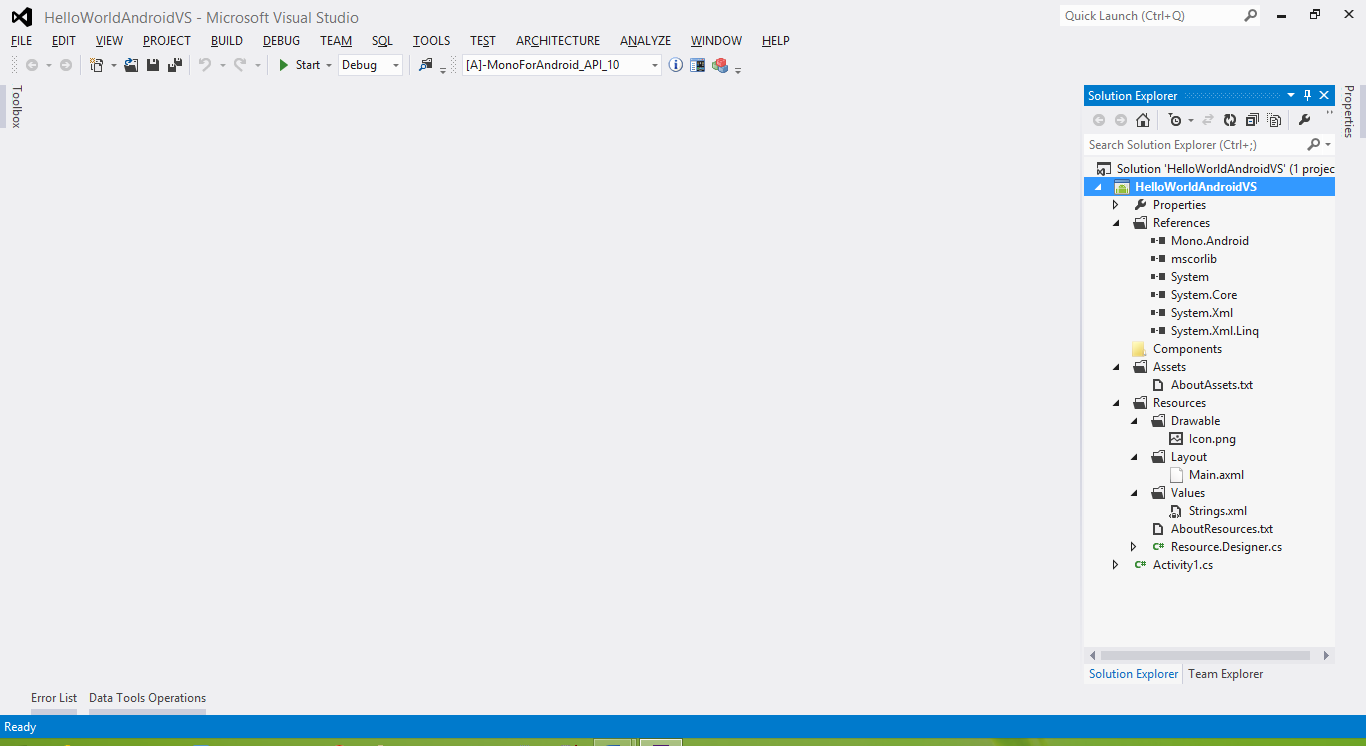
• The default template creates the following files and folders –
o Properties folder - This folder contains the manifest file for the application
o References folder - Contains all references added to the project. It is to be noted that a reference
to Mono.Android has been added to the project.
o Assets folder - This folder contains all the files that needs to be included in the final package.
You can access the files included in this folder at runtime using Assets class.
o Resources folder - The resources folder contain application resources. For example, the resources
folder has the icons used by the application under Resources\Drawable folder,
the layout of the screens under Resources\Layout folder and the XML Value definitions
under Resources\Values folder.
o Activity1.cs file - Activity.cs file is the most important file of this template as this is the starting
point of the application. An Activity can be compared with a Page in ASP.Net
project. Every Activity has some methods ane events predefined that are called
at dif
Now, let’s discuss the template in detail.
Main.axml file
This file stores the layout of the App screen. The layout are stored under Resources\Layout
folder and is in simple words a XML file storing the layout.
<?xml version="1.0" encoding="utf-8"?>
<LinearLayout xmlns:android="http://schemas.android.com/apk/res/android"
android:orientation="vertical"
android:layout_width="fill_parent"
android:layout_height="fill_parent">
<Button
android:id="@+id/MyButton"
android:layout_width="fill_parent"
android:layout_height="wrap_content"
android:text="@string/Hello" />
</LinearLayout>
In the above code layout, we define a LinearLayout control to store all other controls. We further define the Orientation property of the layout to be set at vertical. Further, we add a Button control to
the layout’s controls. 2 important things to be noted with the button control
are the android:id and android:text properties. The android:id property assigns the ID of the button control. Setting
the ID value of the control in the format “@+id/BUTTON_ID” allows us to access
the control in the Activity file. We will see this later in the article. The
android:text property assigns the text of the button control. Setting the Text
value of the control in the format “@string/KEY_NAME” allows the app to read
the user defined declaration present in XML file and assign the value to the
control.
String.xml
<?xml version="1.0" encoding="utf-8"?>
<resources>
<string name="Hello">Hello World, Click Me!</string>
<string name="ApplicationName">HelloWorldAndroidVS</string>
</resources>
The string.xml file contains all user defined string resources that can be used by
the app’s layout. For ex- the above file defines 2 custom resources named “Hello”
and “ApplicationName”. If you see the Main.axml file, you will notice we have
set the button text to “@string/Hello”. This key “Hello” is located in String.xml
file and the app reads the data from this file.
Activity1.cs
using System;
using Android.App;
using Android.Content;
using Android.Runtime;
using Android.Views;
using Android.Widget;
using Android.OS;
namespace HelloWorldAndroidVS
{
[Activity(Label = "HelloWorldAndroidVS", MainLauncher = true, Icon = "@drawable/icon")]
public class Activity1 : Activity
{
int count = 1;
protected override void OnCreate(Bundle bundle)
{
base.OnCreate(bundle);
// Set our view from the "main" layout resource
SetContentView(Resource.Layout.Main);
// Get our button from the layout resource,
// and attach an event to it
Button button = FindViewById<Button>(Resource.Id.MyButton);
button.Click += delegate { button.Text = string.Format("{0} clicks!", count++); };
}
}
}
This is the most important part of the Android App created and I explain the same
here. At the beginning the Android namespaces are added to the project. Then,
the class is defined and the class is decorated with a couple of attributes.
The “Label” property defines the name appeared on the Activity screen. The “MainLauncher”
property tells the android runtime engine to load this Activity as the main screen
of the app. The “Icon” property defines the icon to be displayed for the Activity.
In the Activity class, we override the base function OnCreate() that is called after
the activity is created on the app. The first line calls the base OnCreate().
After that we set the Content Layout of the activity using the below line –
SetContentView(Resource.Layout.Main);
The above line loads the main.axml file present in Resources\Layout folder. If you
notice, you can access the Resources folder using the Resources class in code
behind. The Resource class is in the file Resource.Designer.cs and is auto generated
when the program is compiled. The Resource class creates a nested class named
“Layout” to store all .axml files present in Resources\Layout folder.
After setting the layout, we find the button using FindViewByID< >(). This
function lets you reference any control on the .axml file using the ID of the
control.
Button button = FindViewById<Button>(Resource.Id.MyButton);
Another thing to notice here is we can actually access the ID of the control using
Resource.ID class. Internally when the app creates the Resource class it also
creates a nested class named “ID” to store ID of all controls present in .axml
files.
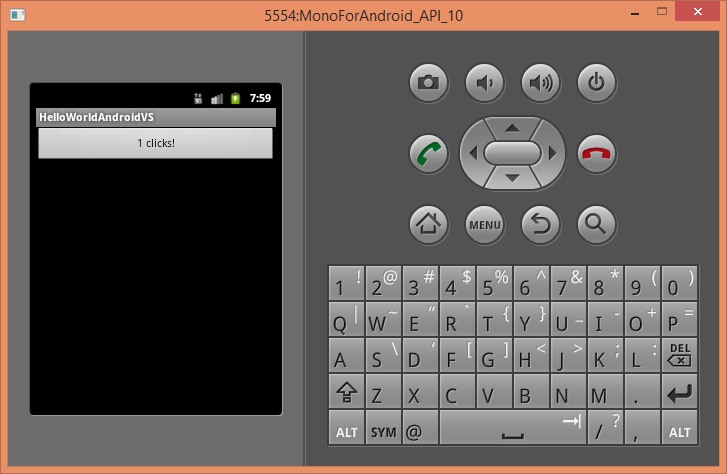
button.Click += delegate { button.Text = string.Format("{0} clicks!", count++); };
The final statement is a plain C# statement where we add a Click event handler to
the button and modify its text.
Once you compile the project and run, you will see the Android emulator will start
and the app will be auto-deployed to your emulator. Once deployed, the application
will look like as below-
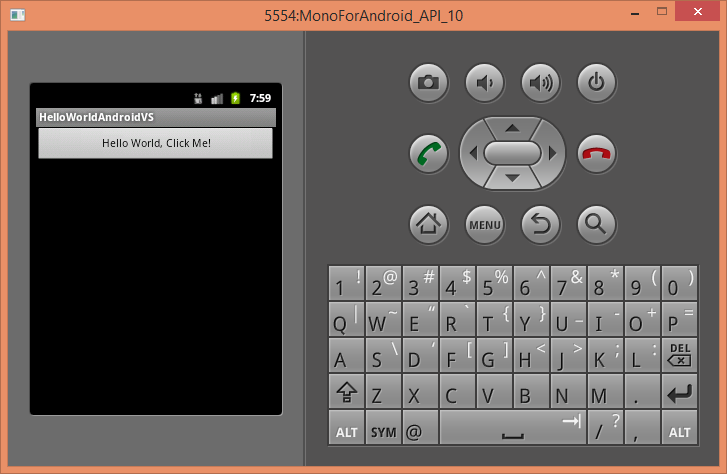
After you click on the button, the app changes to the below screen.
Hope you like this article. Let me know if you have any doubts/questions via comments
below.
Source Code: HelloWorldAndroidVS.zip